The Madder Saga
Friends who have been following my CSA start-up’s progress will recall that Jan offered to give me all her madder roots, if I would only come and dig them up. She had decided that working with natural dyes did not suit her, and that her garden could expand into the bed these plants had been taking up since 2003. Here’s the story of that adventure.
I got most of the roots planted, but held some back for experimenting with, as I like to be able to tell others “Yes, I really have tried this myself and it worked”. I set up a series of madder projects, to extract as much dye goodness as I possibly could from the roots. First, I soaked the roots in a large bucket for several days to soften them.
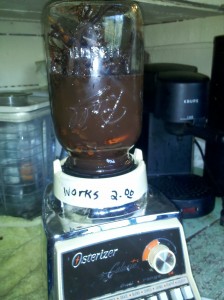
Using a blender set aside for that purpose, I ground up all the madder roots before adding to the dyepot.
Next, I used a quart mason jar, an extra blender base and my $2 thrift store blender, and chopped up all the roots before adding them to the dyepot.
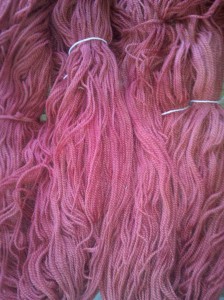
I slowly started to heat the dye bath, being very careful not to heat it to the boiling point. From all I have read, this temperature point is where there is a transition into the more orange range of the color, and I wanted to see how close to cherry red I could come. The color was extracted rather quickly, and my first dyebath was employed to color enough yarn for this jacket.
I wish my camera had captured the depth of color! It is actually a deeper, much richer shade of coral pinkish-red, very close to the cherry red I had hoped for, and I was delighted. My Knit Swirl jacket will have alternating bands of this darker, DK wool version of madder and lighter kid mohair bands, also dyed (earlier this spring, at Anni Redding’s) with madder.
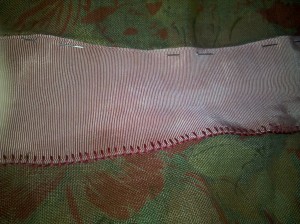
I threw a length of antique grosgrain ribbon from Red Comb Vintage in the pot and let it cool down overnight.
The next day, I reheated the madder solution and threw in some of my handspun, getting a similar result to my earlier experiment at Anni’s. Although I was again careful of the temperature, I think that having extracted so much color initially, I ended up with a lighter shade.
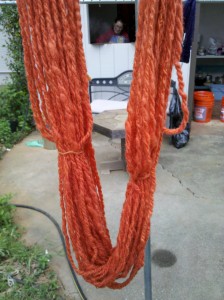
After this second dye bath had cooled, I poured it into a jar and saved it for the Living Skills Day presentation that I was putting on several days later. There, I put the jar out in the sun, with a few pieces of vintage lace pillowcases in it. I just cannot bear to see lovely, old bits of handcrafted pieces, whether lace or embroidery, languishing at thrift stores and yard sales, and always paw through them even if I decide not to buy. This time, I was thankful to have these lovely bits, done on a very fine crochet hook by someone who was probably much like my own grandmother or great aunt, whiling away the hours making trims for nightgowns and pillowcases. After the Living Skills event, I placed this jar, and another with a very strong leftover black tea bath, out in the sun in the yard for several weeks, and just a few days ago pulled out my lacy bits to dry.
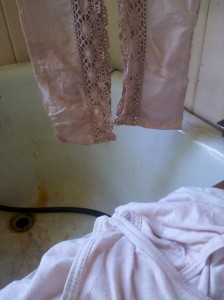
These remnants of crocheted lace, as well as the underthings in the foreground, were both dyed with the third, mostly exhausted, bath from madder roots.
As you can see, the bath has gotten more exhausted, and unmordanted cottons such as these don’t take up much color. However, a very sweet shade of antique pink was achieved, something to be quite pleased with, even should they not last all that long.
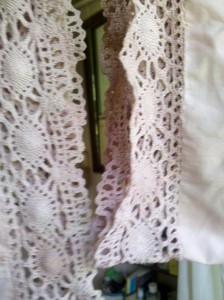
This cotton crocheted lace is unmordanted, and spent several weeks in a partially-exhausted madder bath.
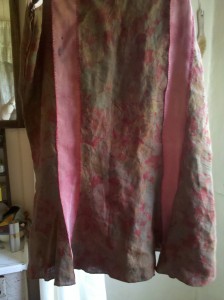
The dye bath has been exhausted, but the saga hasn’t ended yet. I haven’t wound my yarn into balls, nor have I started knitting my jacket. That is a task for fall, when the temperatures drop a good deal, since I am not one to hold a large lapful of wool when the daytime temps are above 80F. However, I did come upon a beautiful linen skirt at the same fire department thrift shop where I found the blender base, and since it was too small for me, decided to enlarge it by adding my beautiful dyed ribbon in between the two front gores.
I took apart the seams, used the machine to zigzag the seam allowances and prevent raveling, then handstitched with blanket stitch in red embroidery floss to insert my ribbons. Inserting a zipper in the side and seam binding along the top helped with ease of wearing and with keeping the drapy, flowing shape of the skirt intact. The seam binding is pink and came from my scavenged collection of trims. I will wear a top that covers the waist rather than tucks in, but nice to have a cotton trim that blends with the rest. Here’s a photo of my finished skirt.
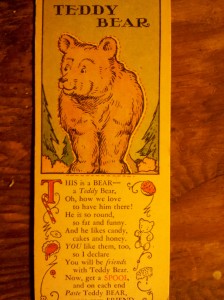
There’s one more treasure that came to light from this project… while sifting through the bias tape bag, I noticed another color was wrapped around this card. Ebay research shows that Spool Zoo cards such as this date from around 1931!




Thanks for the detailed post. My neighbor and I are going to be dyeing sometime in August. I have dried the madder roots but need to read what to do next. Meanwhile, I’m spinning the intended target yarn. I wonder what colors we’ll. Thanks for the warning on temperature – I’ll keep that in mind.